To Everything, Turn…Turn…Turn

Alan's Turning Log – Adventures in Wood Turning

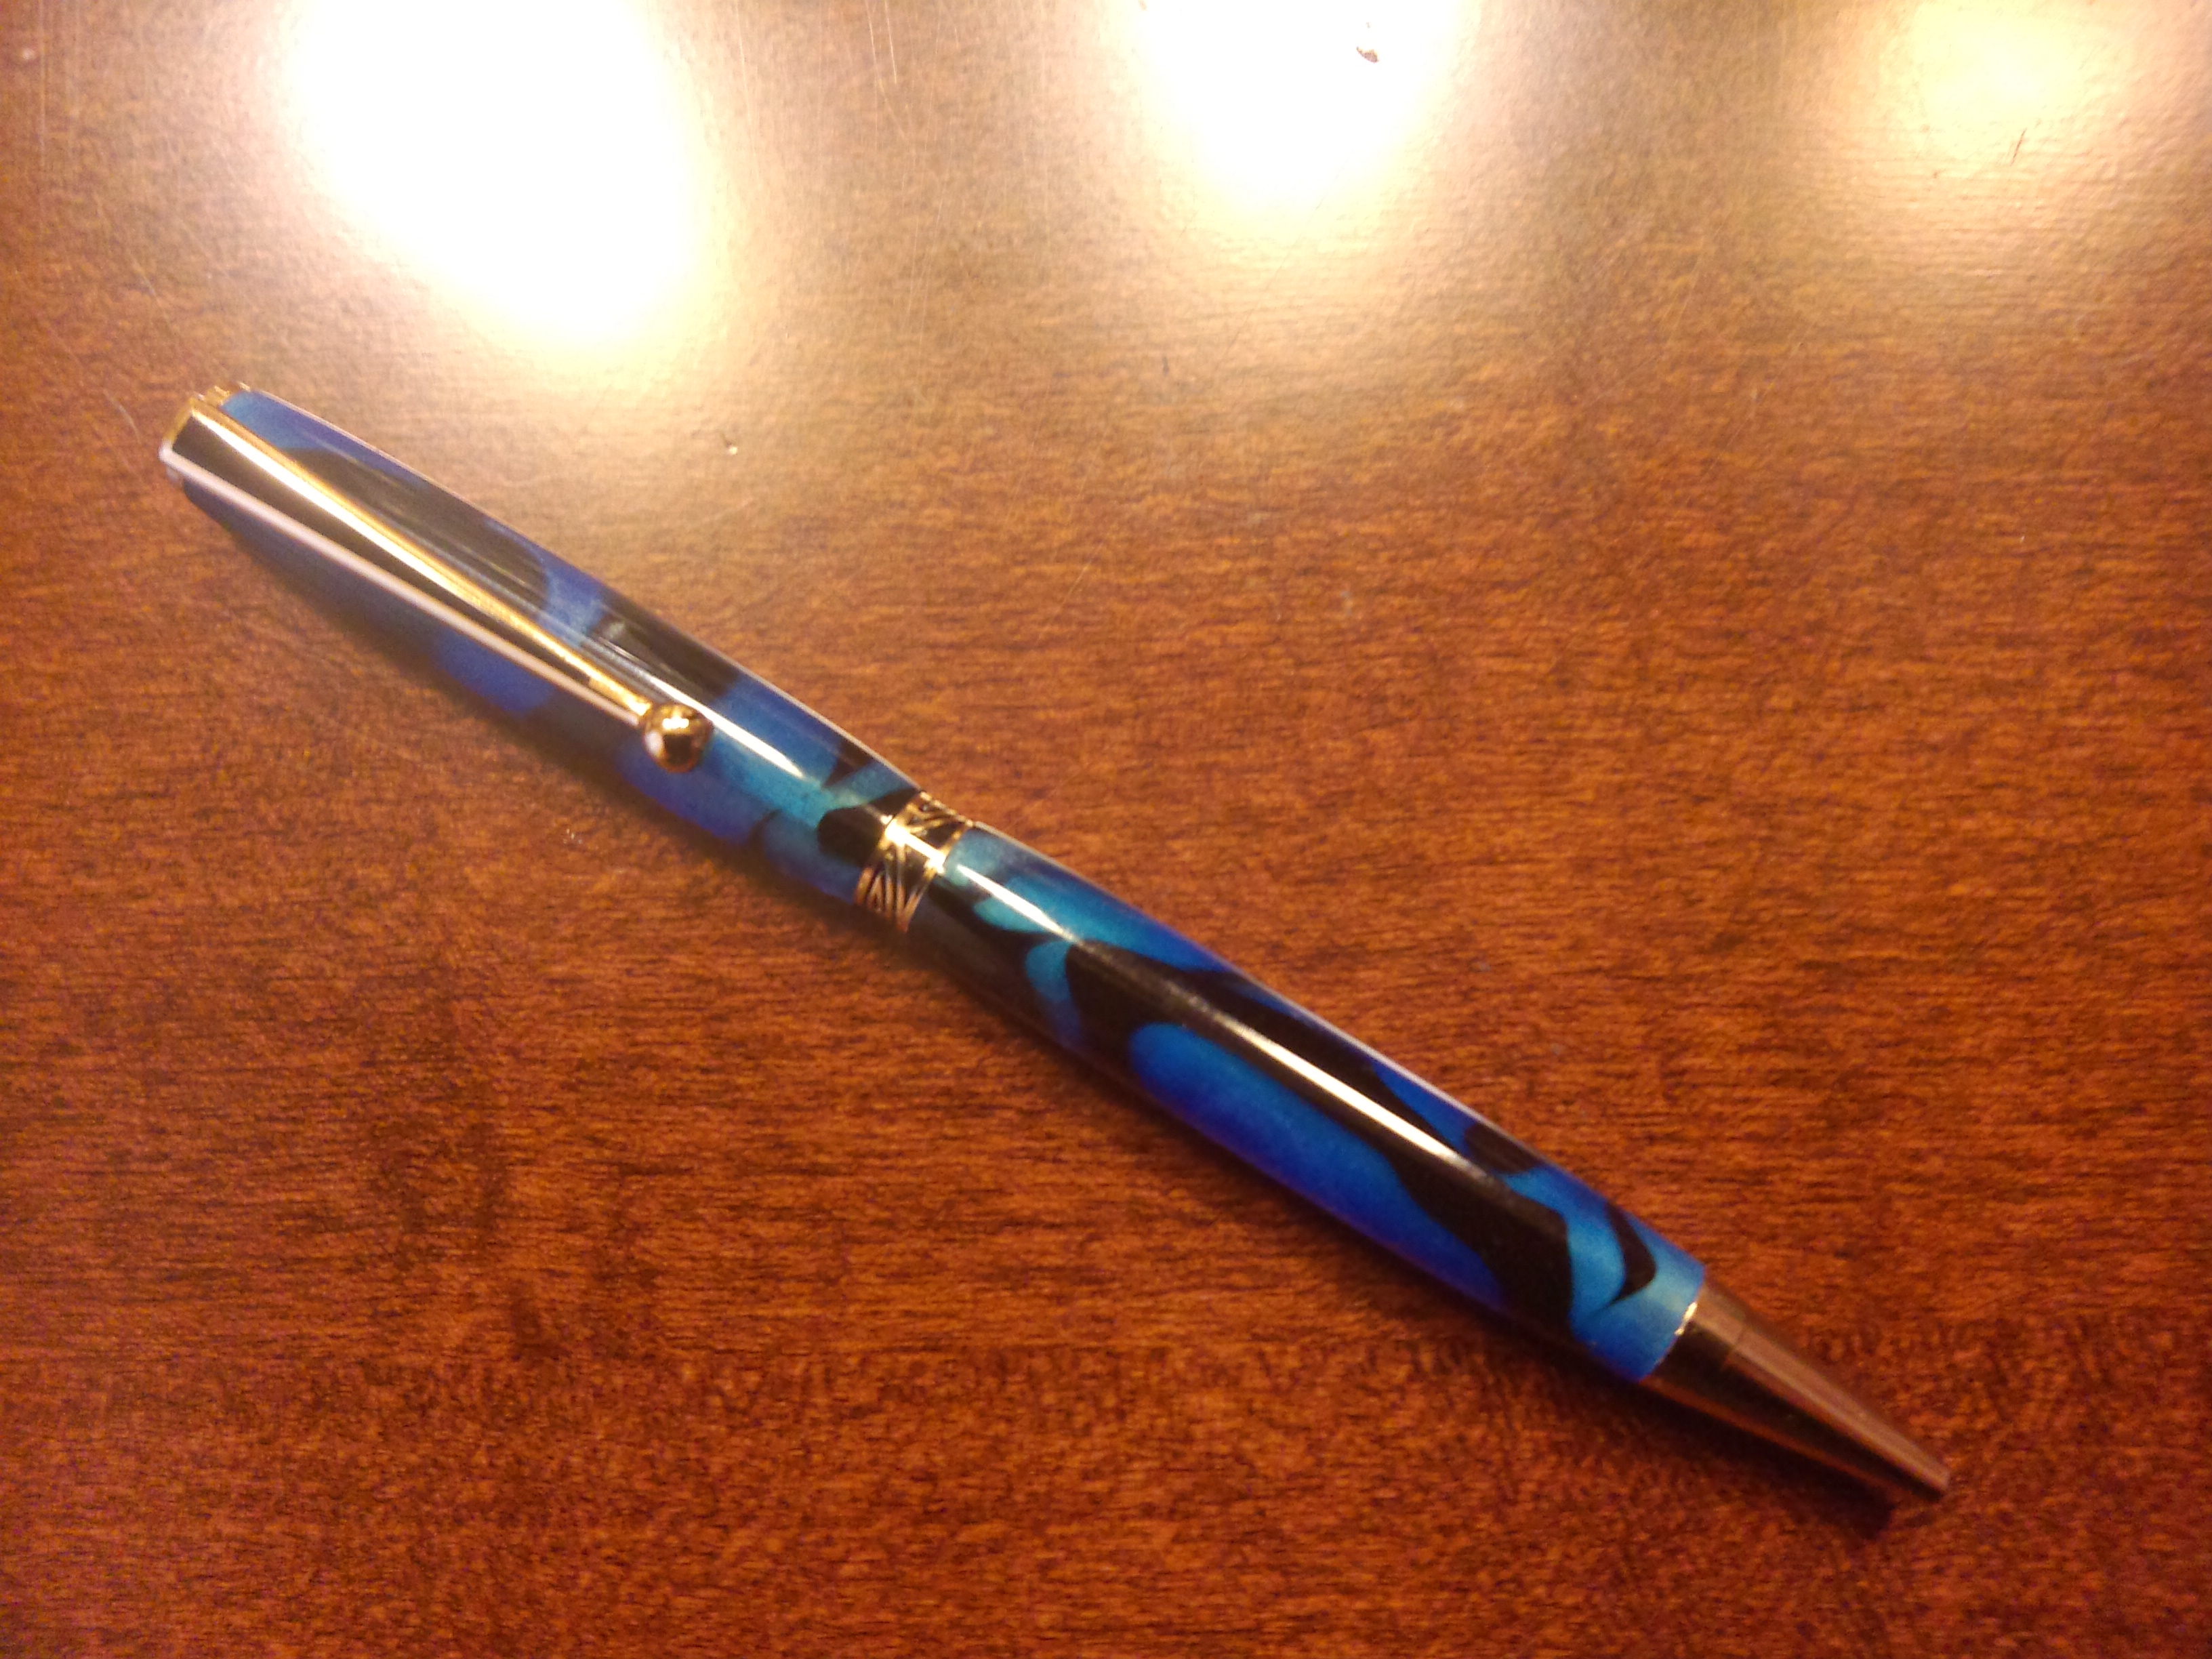
  • A few weeks ago, another member of my section who has been posted this summer mentioned to me that he has started to collect Fountain Pens.  I had already made this fellow a pen for his “going away” gift, but thought that, in light of this new collection of his, I would make another fountain pen.  This one is called a Baron, and it is a beautiful pen kit.  This finish is Gold Titanium and the kit came from Lee Valley.

    Baron Fountain Pen in Gold Titanium and Zebrawood.
    Baron Fountain Pen in Gold Titanium and Zebrawood.

    And this is closed.

    Closed Pen
    Closed Pen

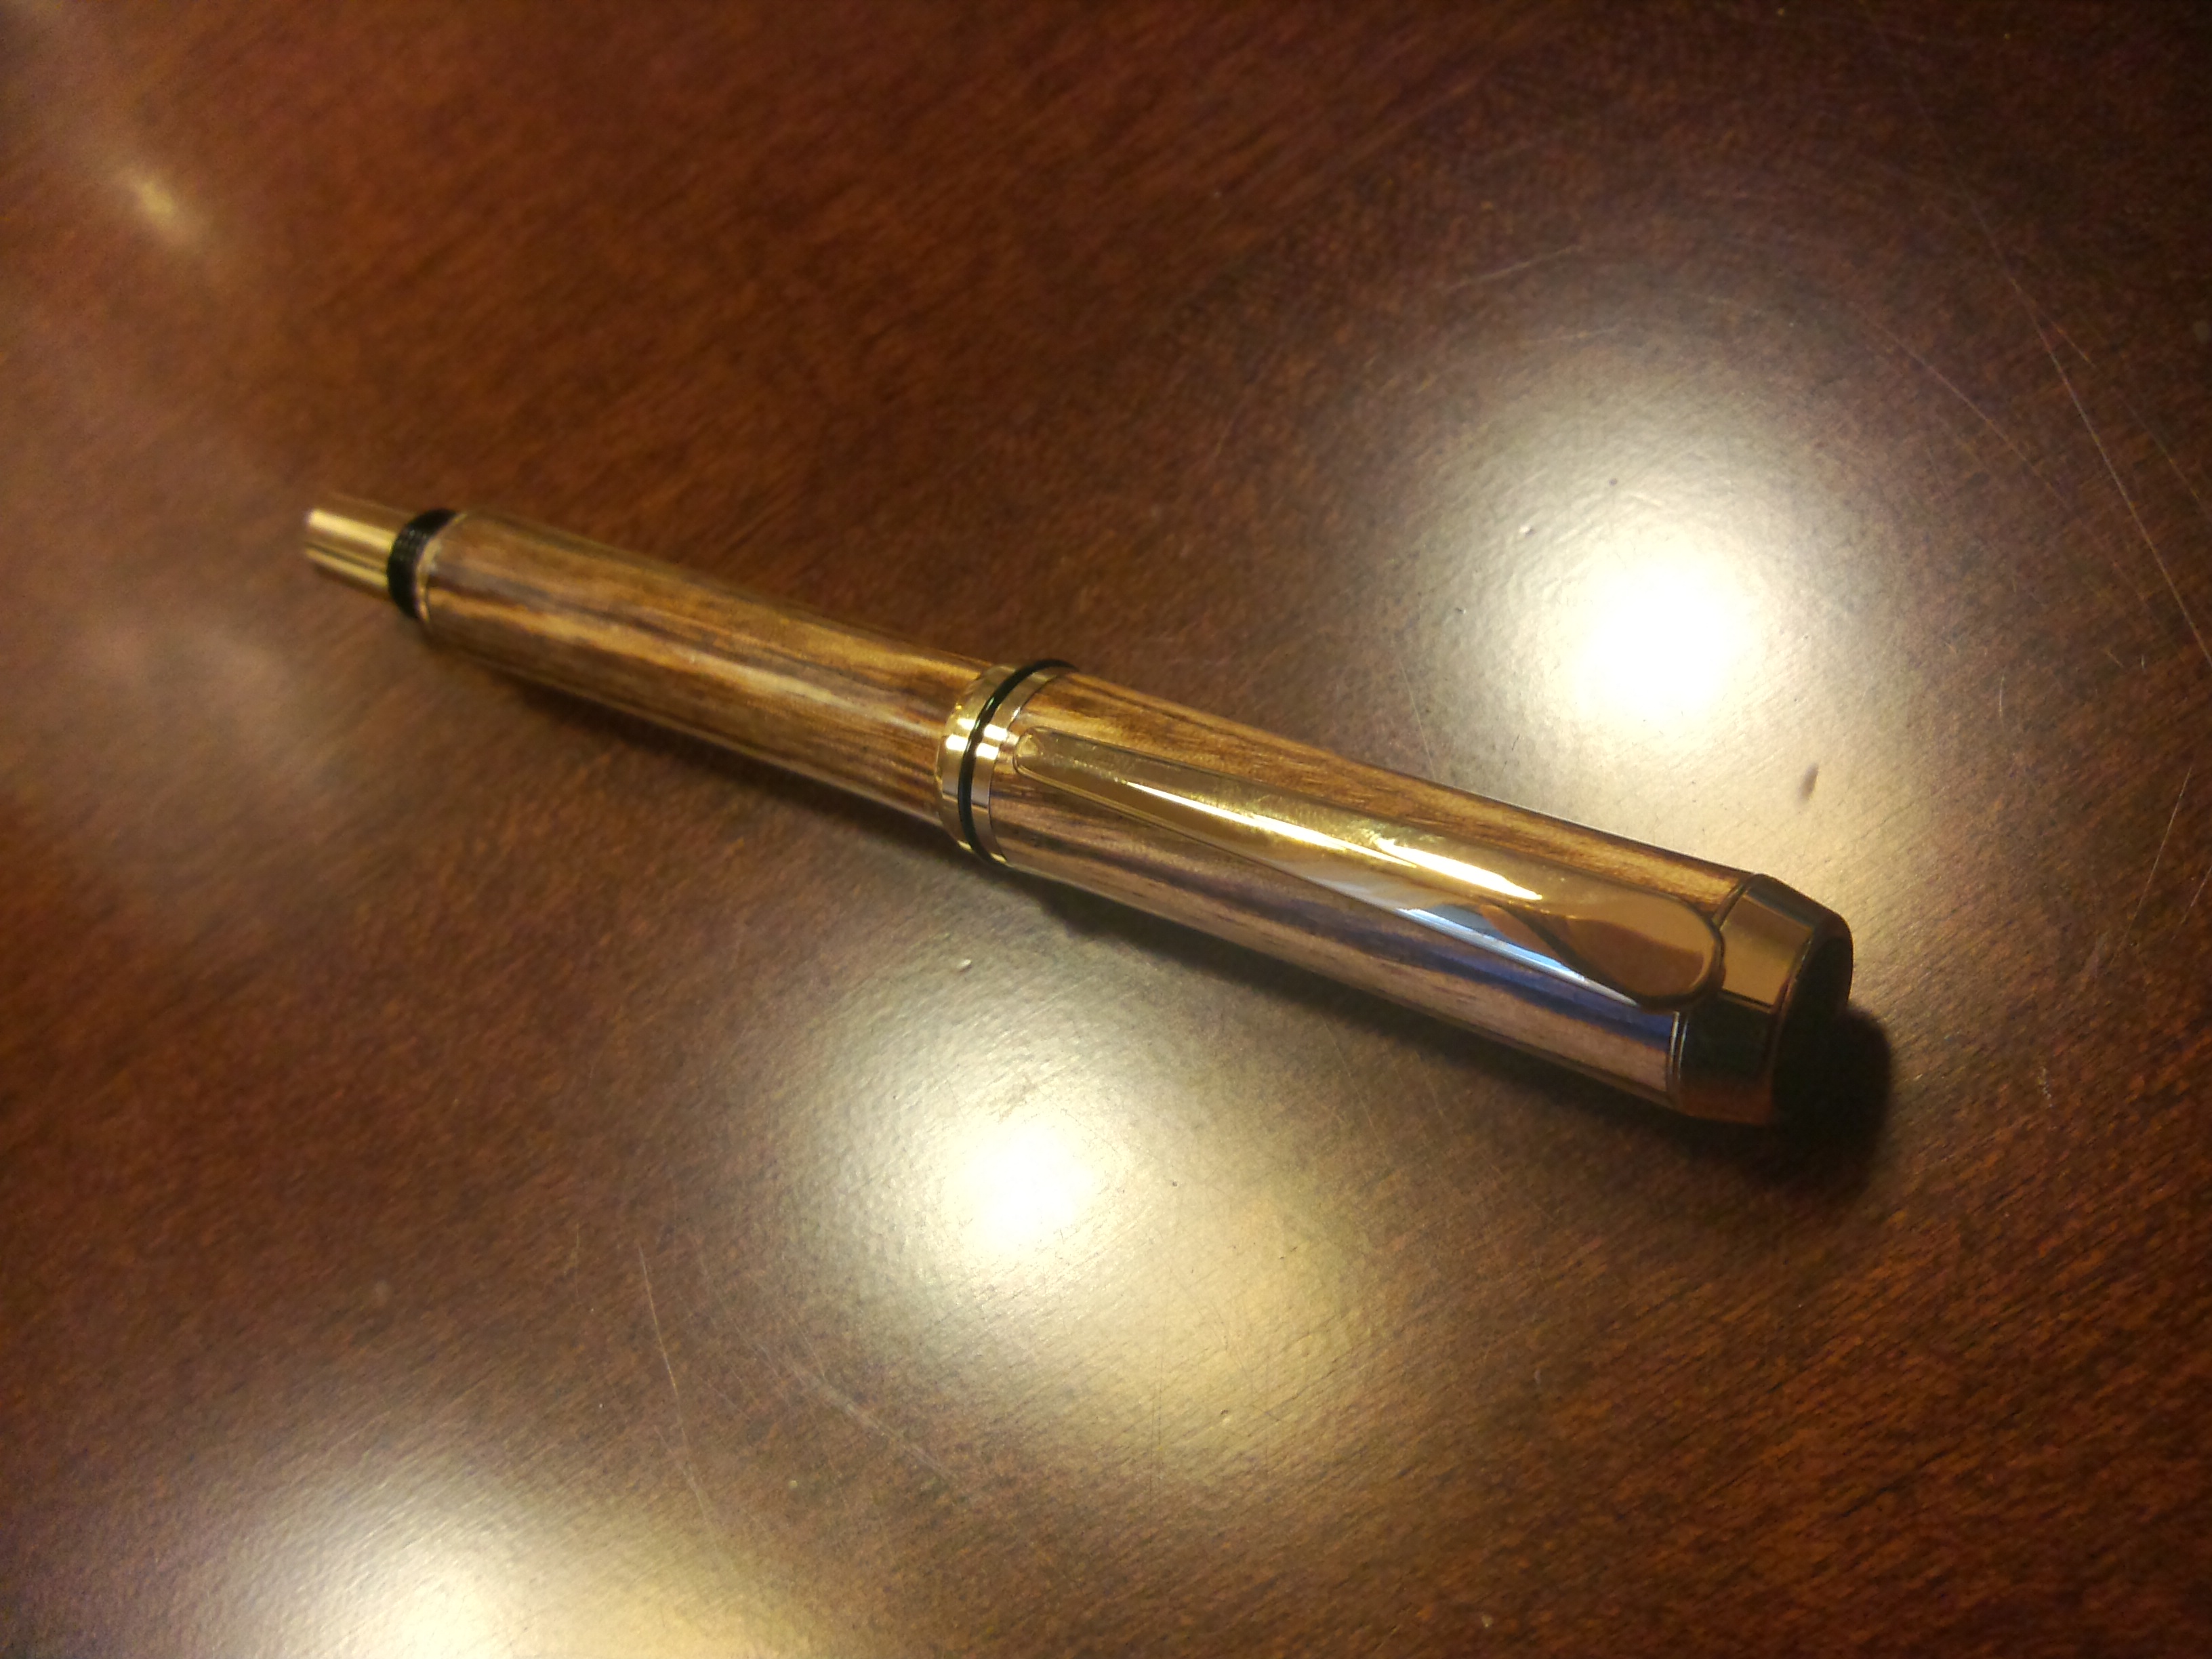
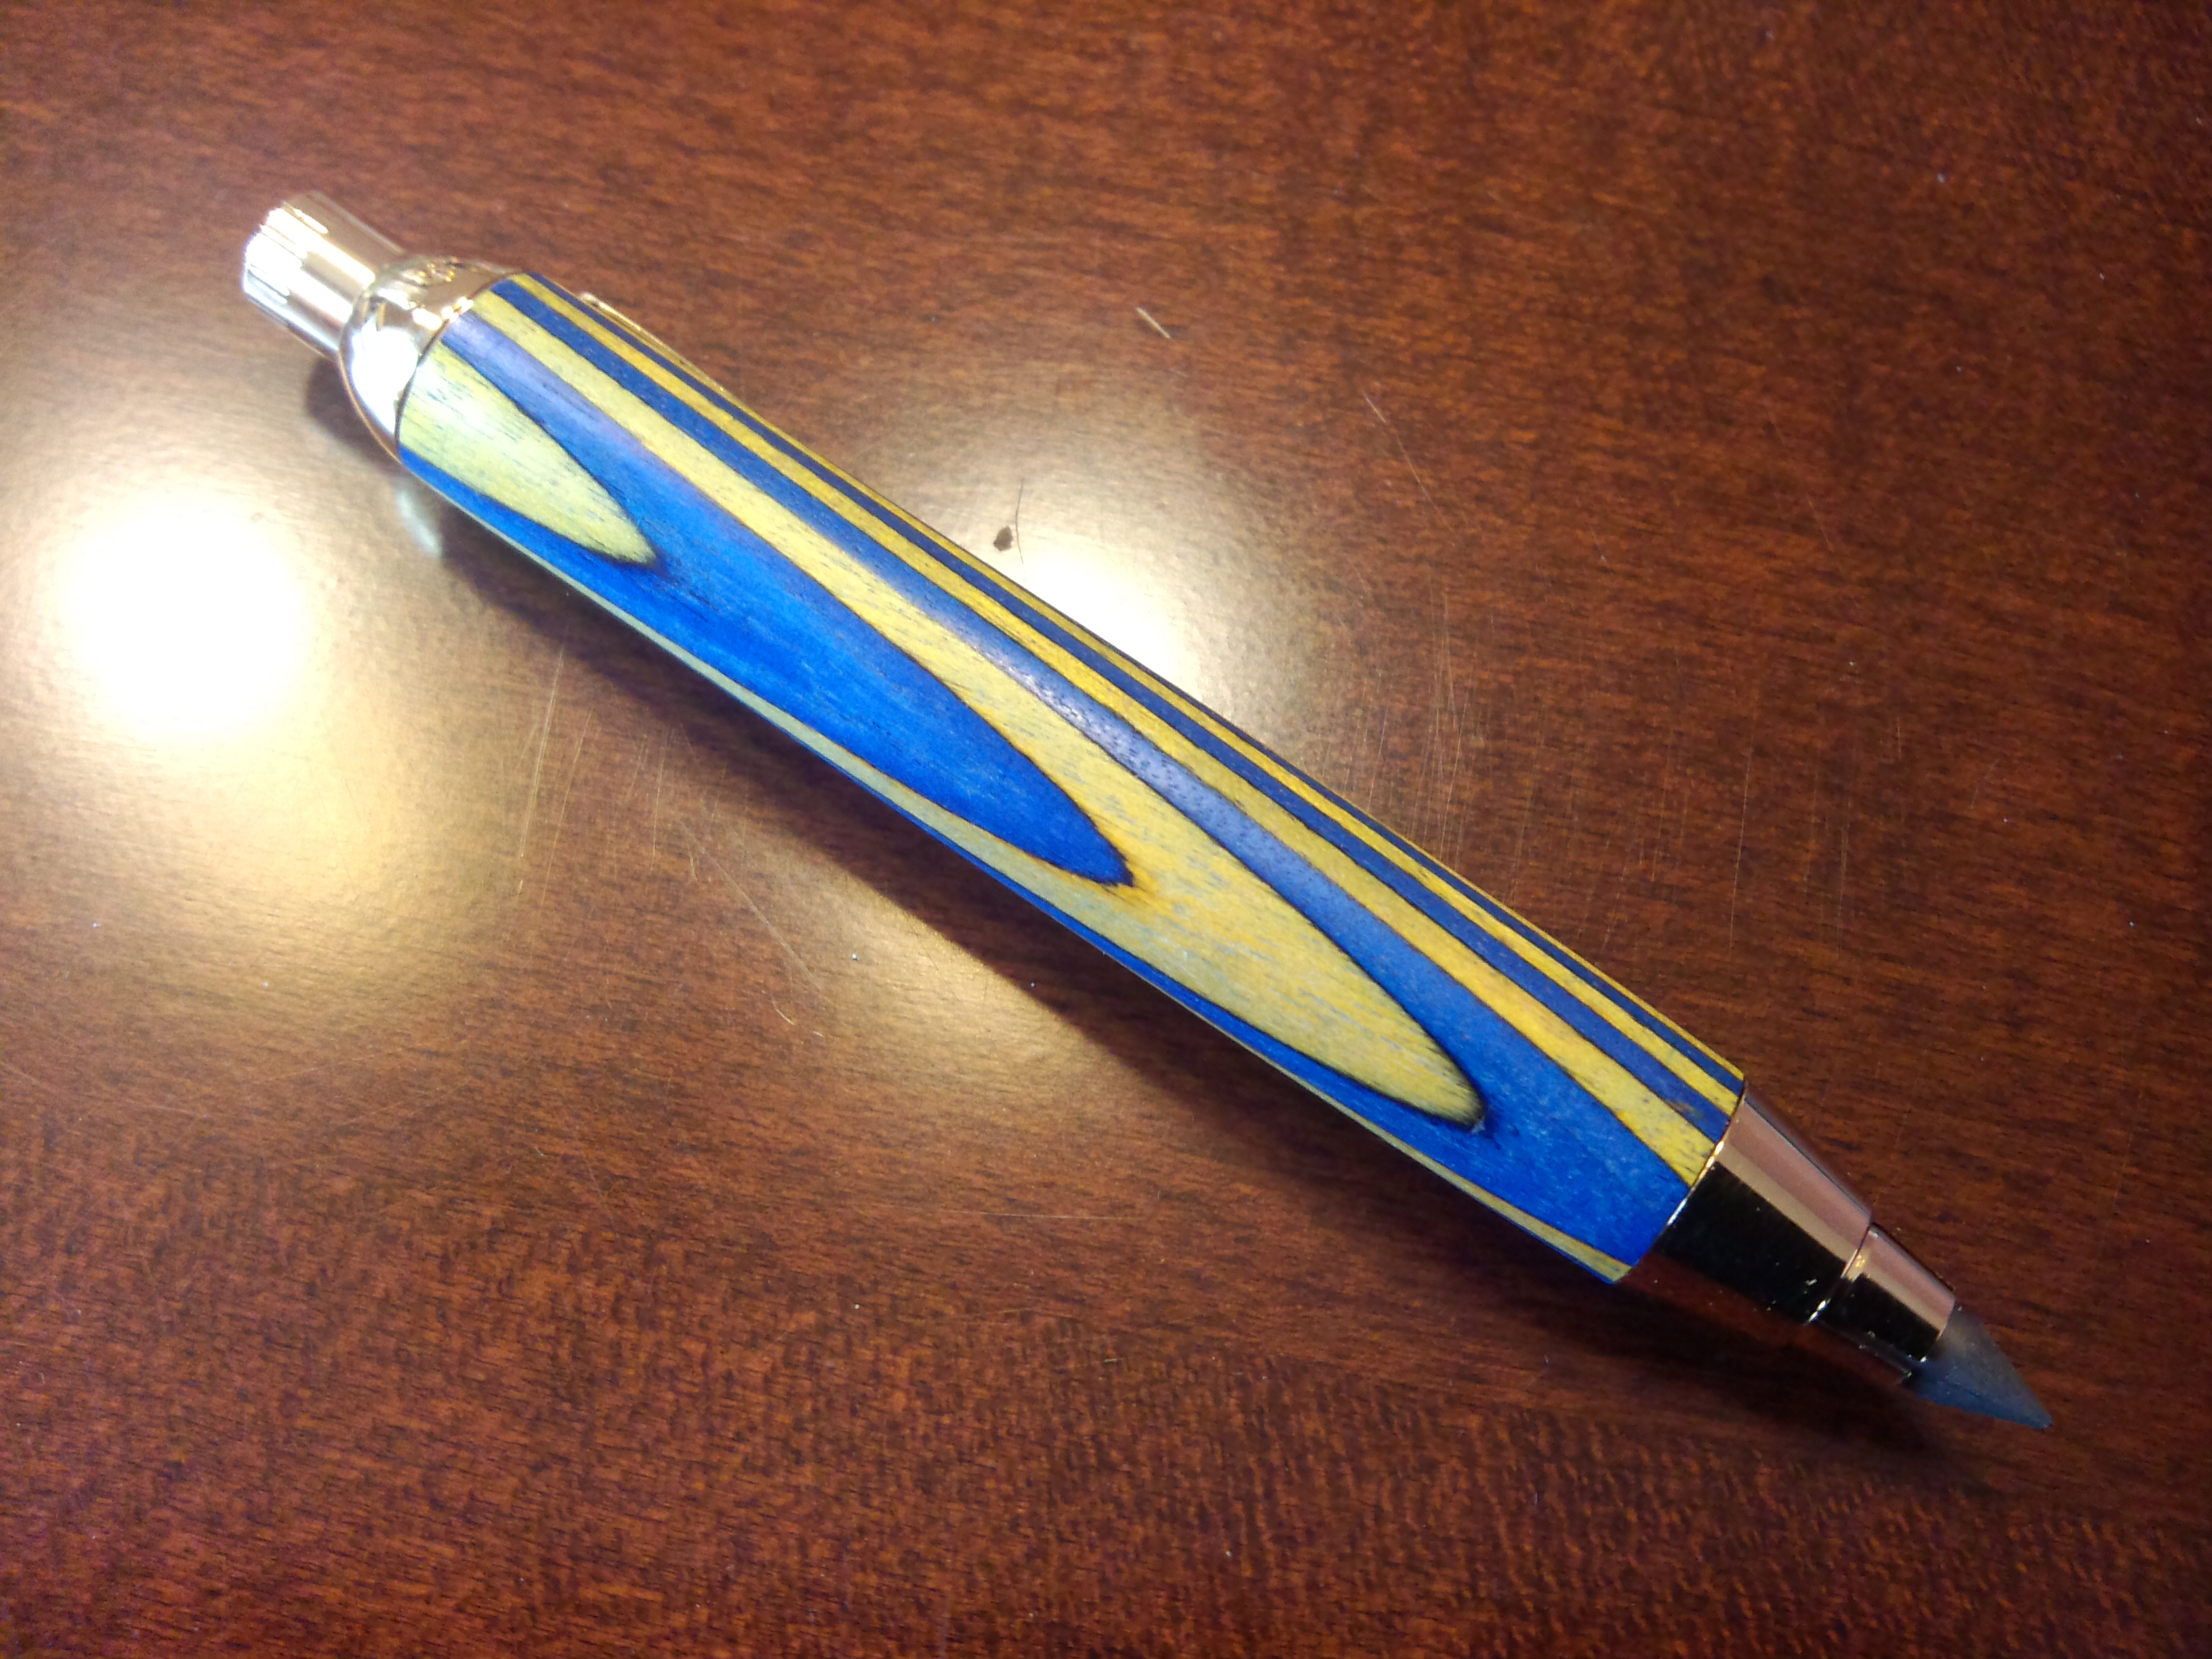
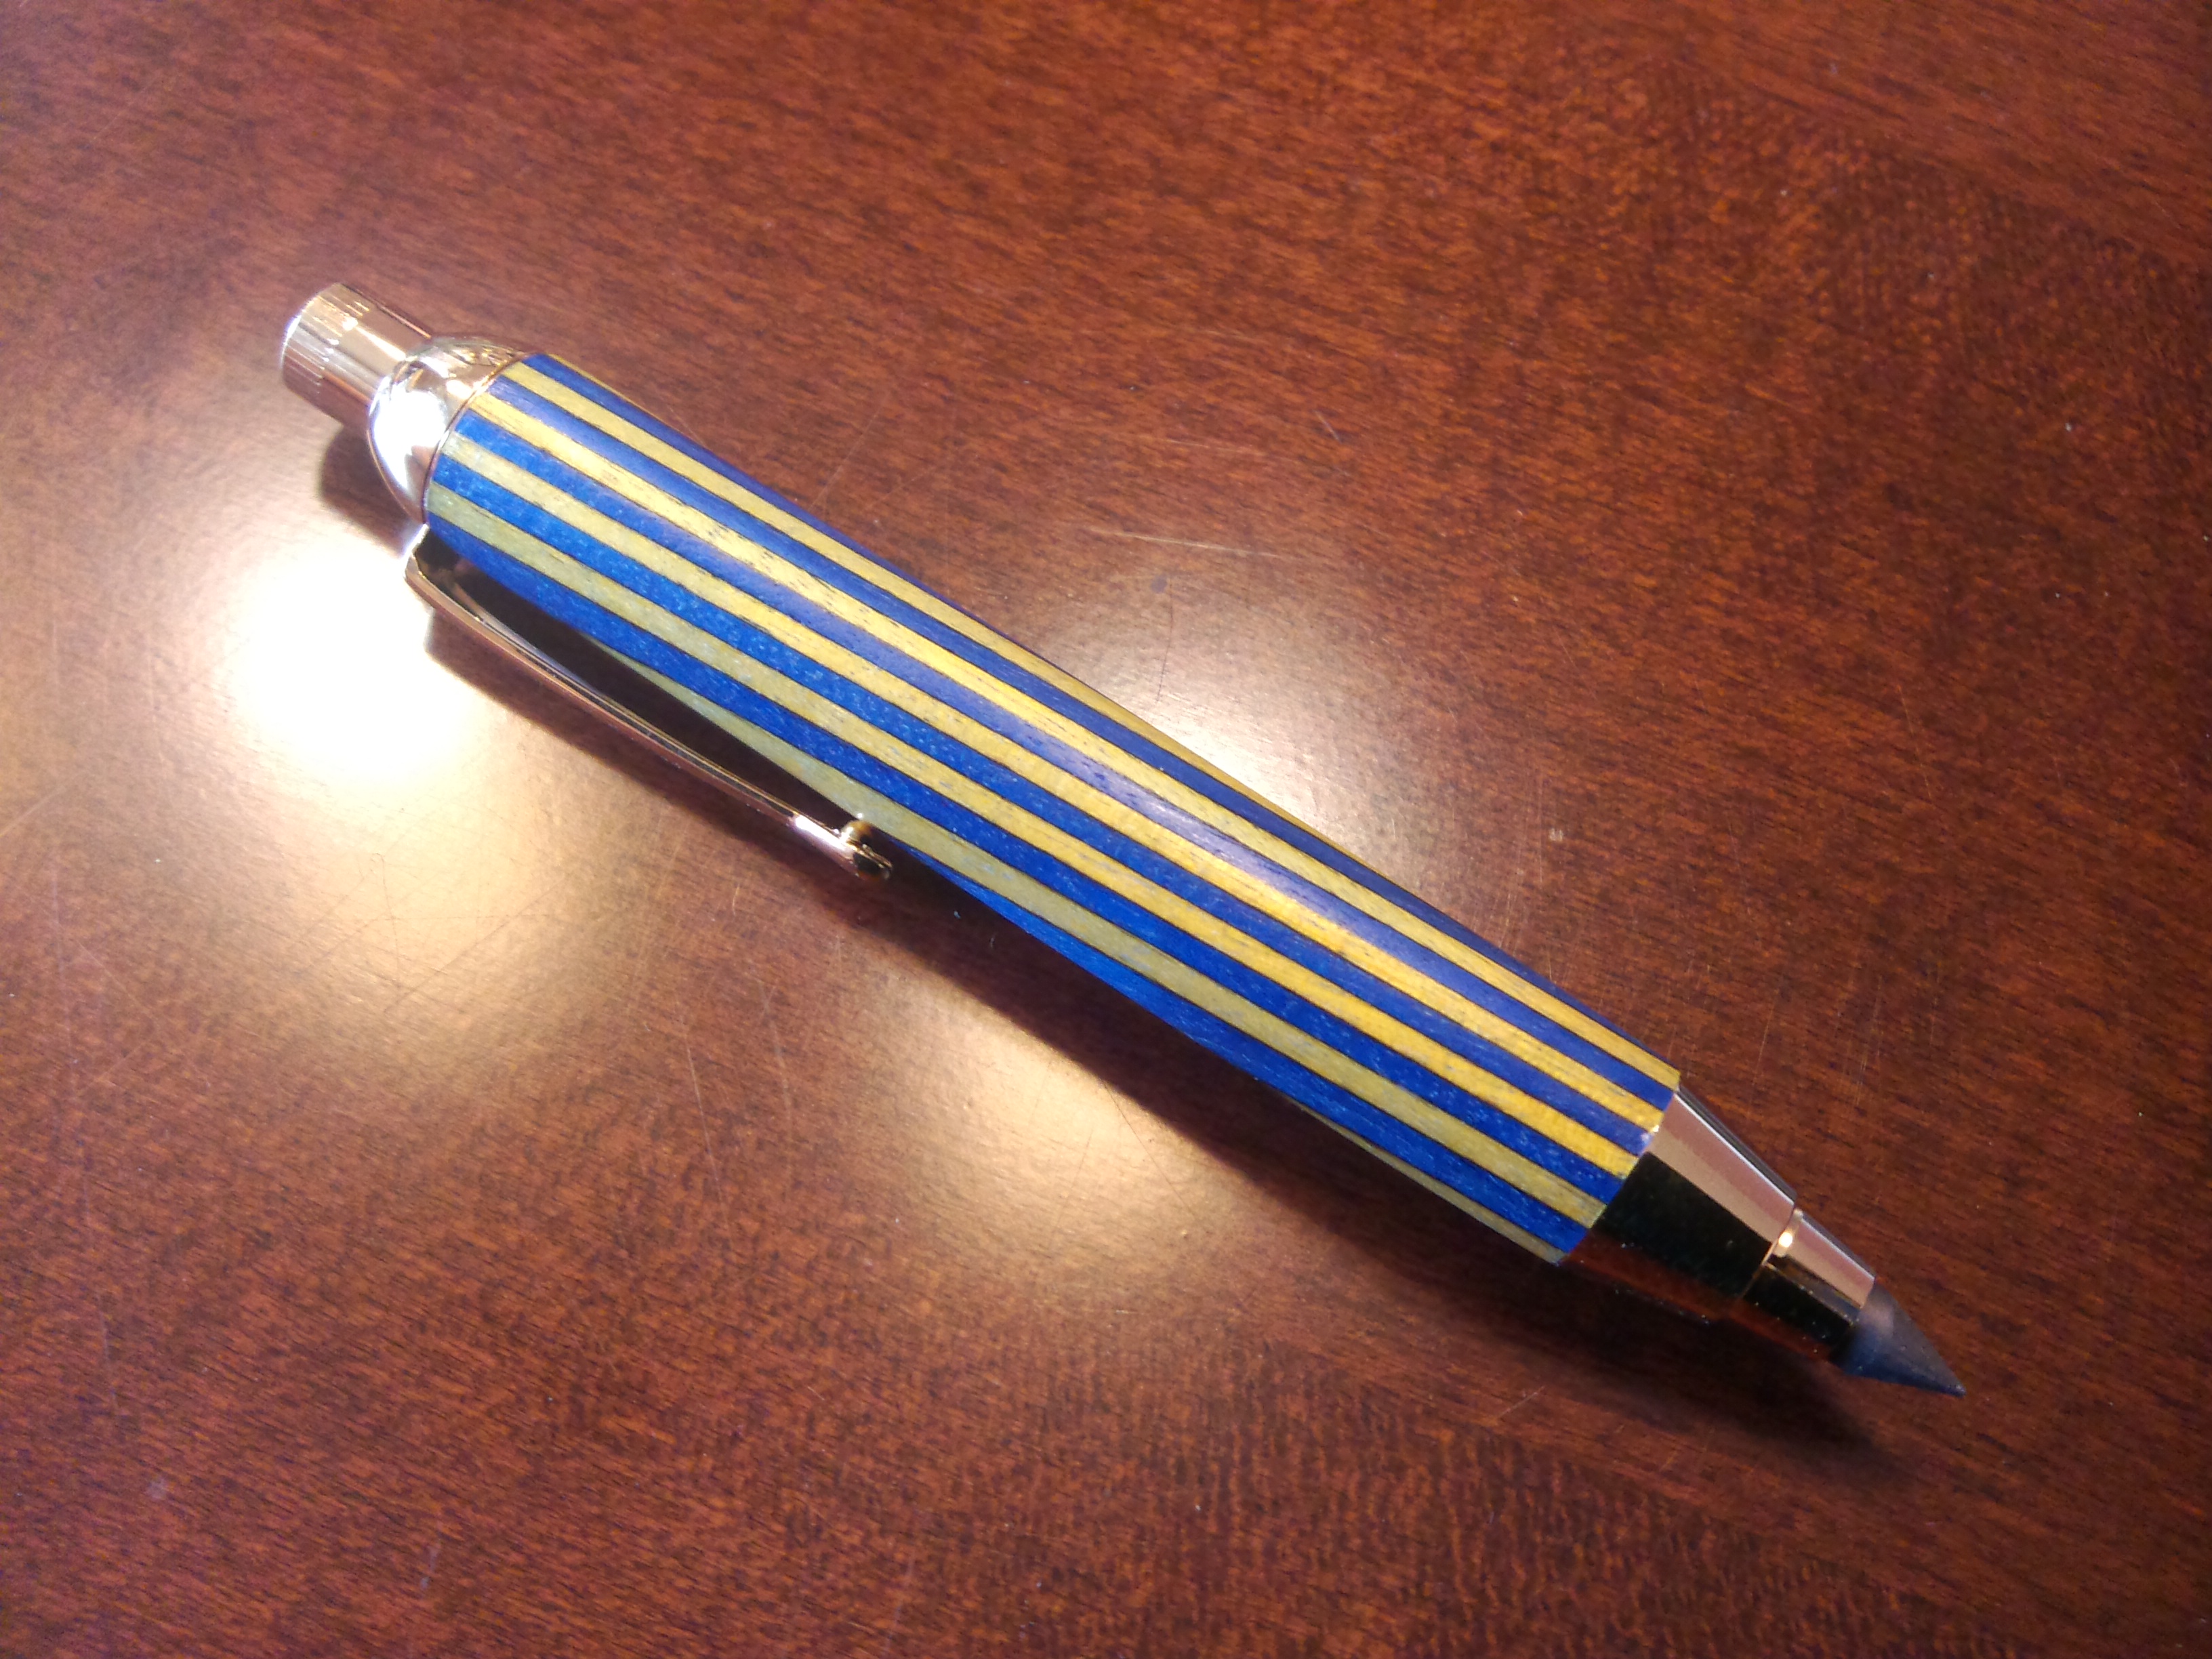
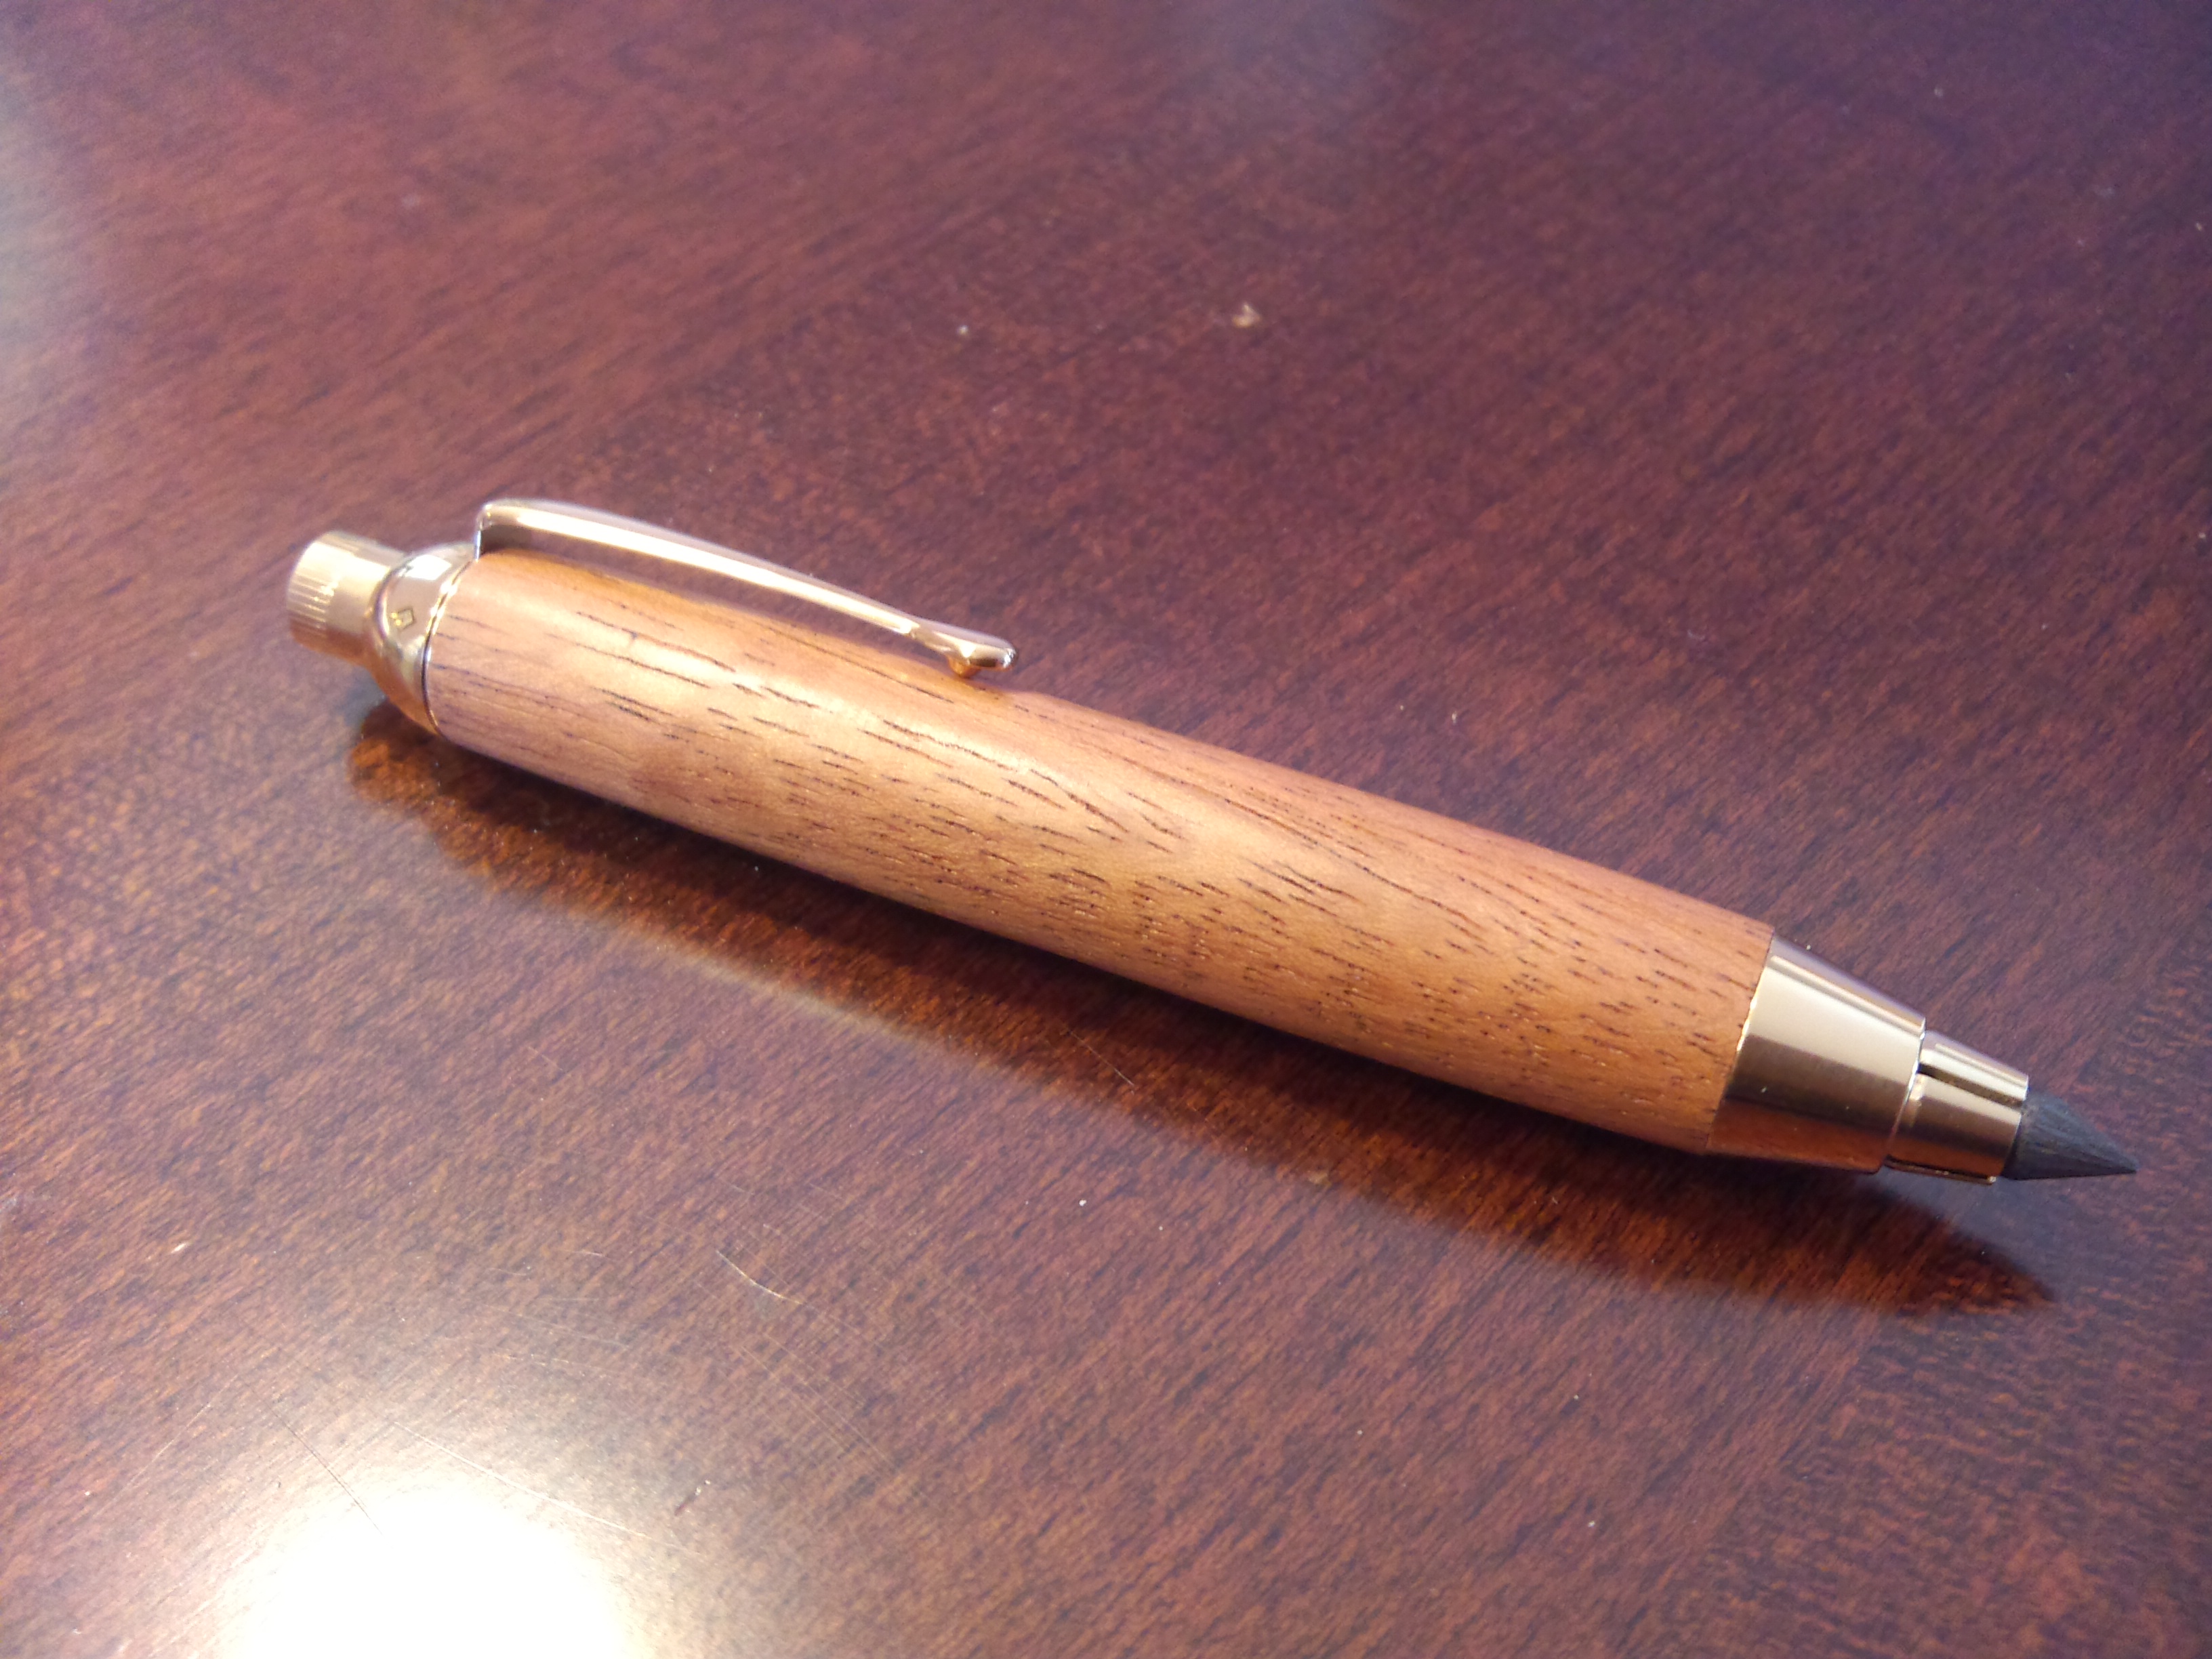
    I tried a new finish method with this pen.  Layering coats of CA Glue (superglue) over the sanded blank and then finish using the wet micromesh sanding pads makes the pen feel like plastic.  When cured CA is basically Acrylic Resin which is what my recent pens are made with.  The nice thing about CA is that it is clear so you can see the wood grain very well.  This is my first Zebrawood and I have to say it is one of my favourites to turn, because it turns like butter.  The grain is magnificent as well.  My favourite conducting baton is Zebrawood.

    At any rate, I will need to play around with my finishing.  Although it is VERY smooth, it isn’t as shiny as I would have liked.  The finish too is not very even.  I think that perhaps my glue is too thick and didn’t soak into the wood evenly.  I am almost out of glue now so I will try a different kind next time.

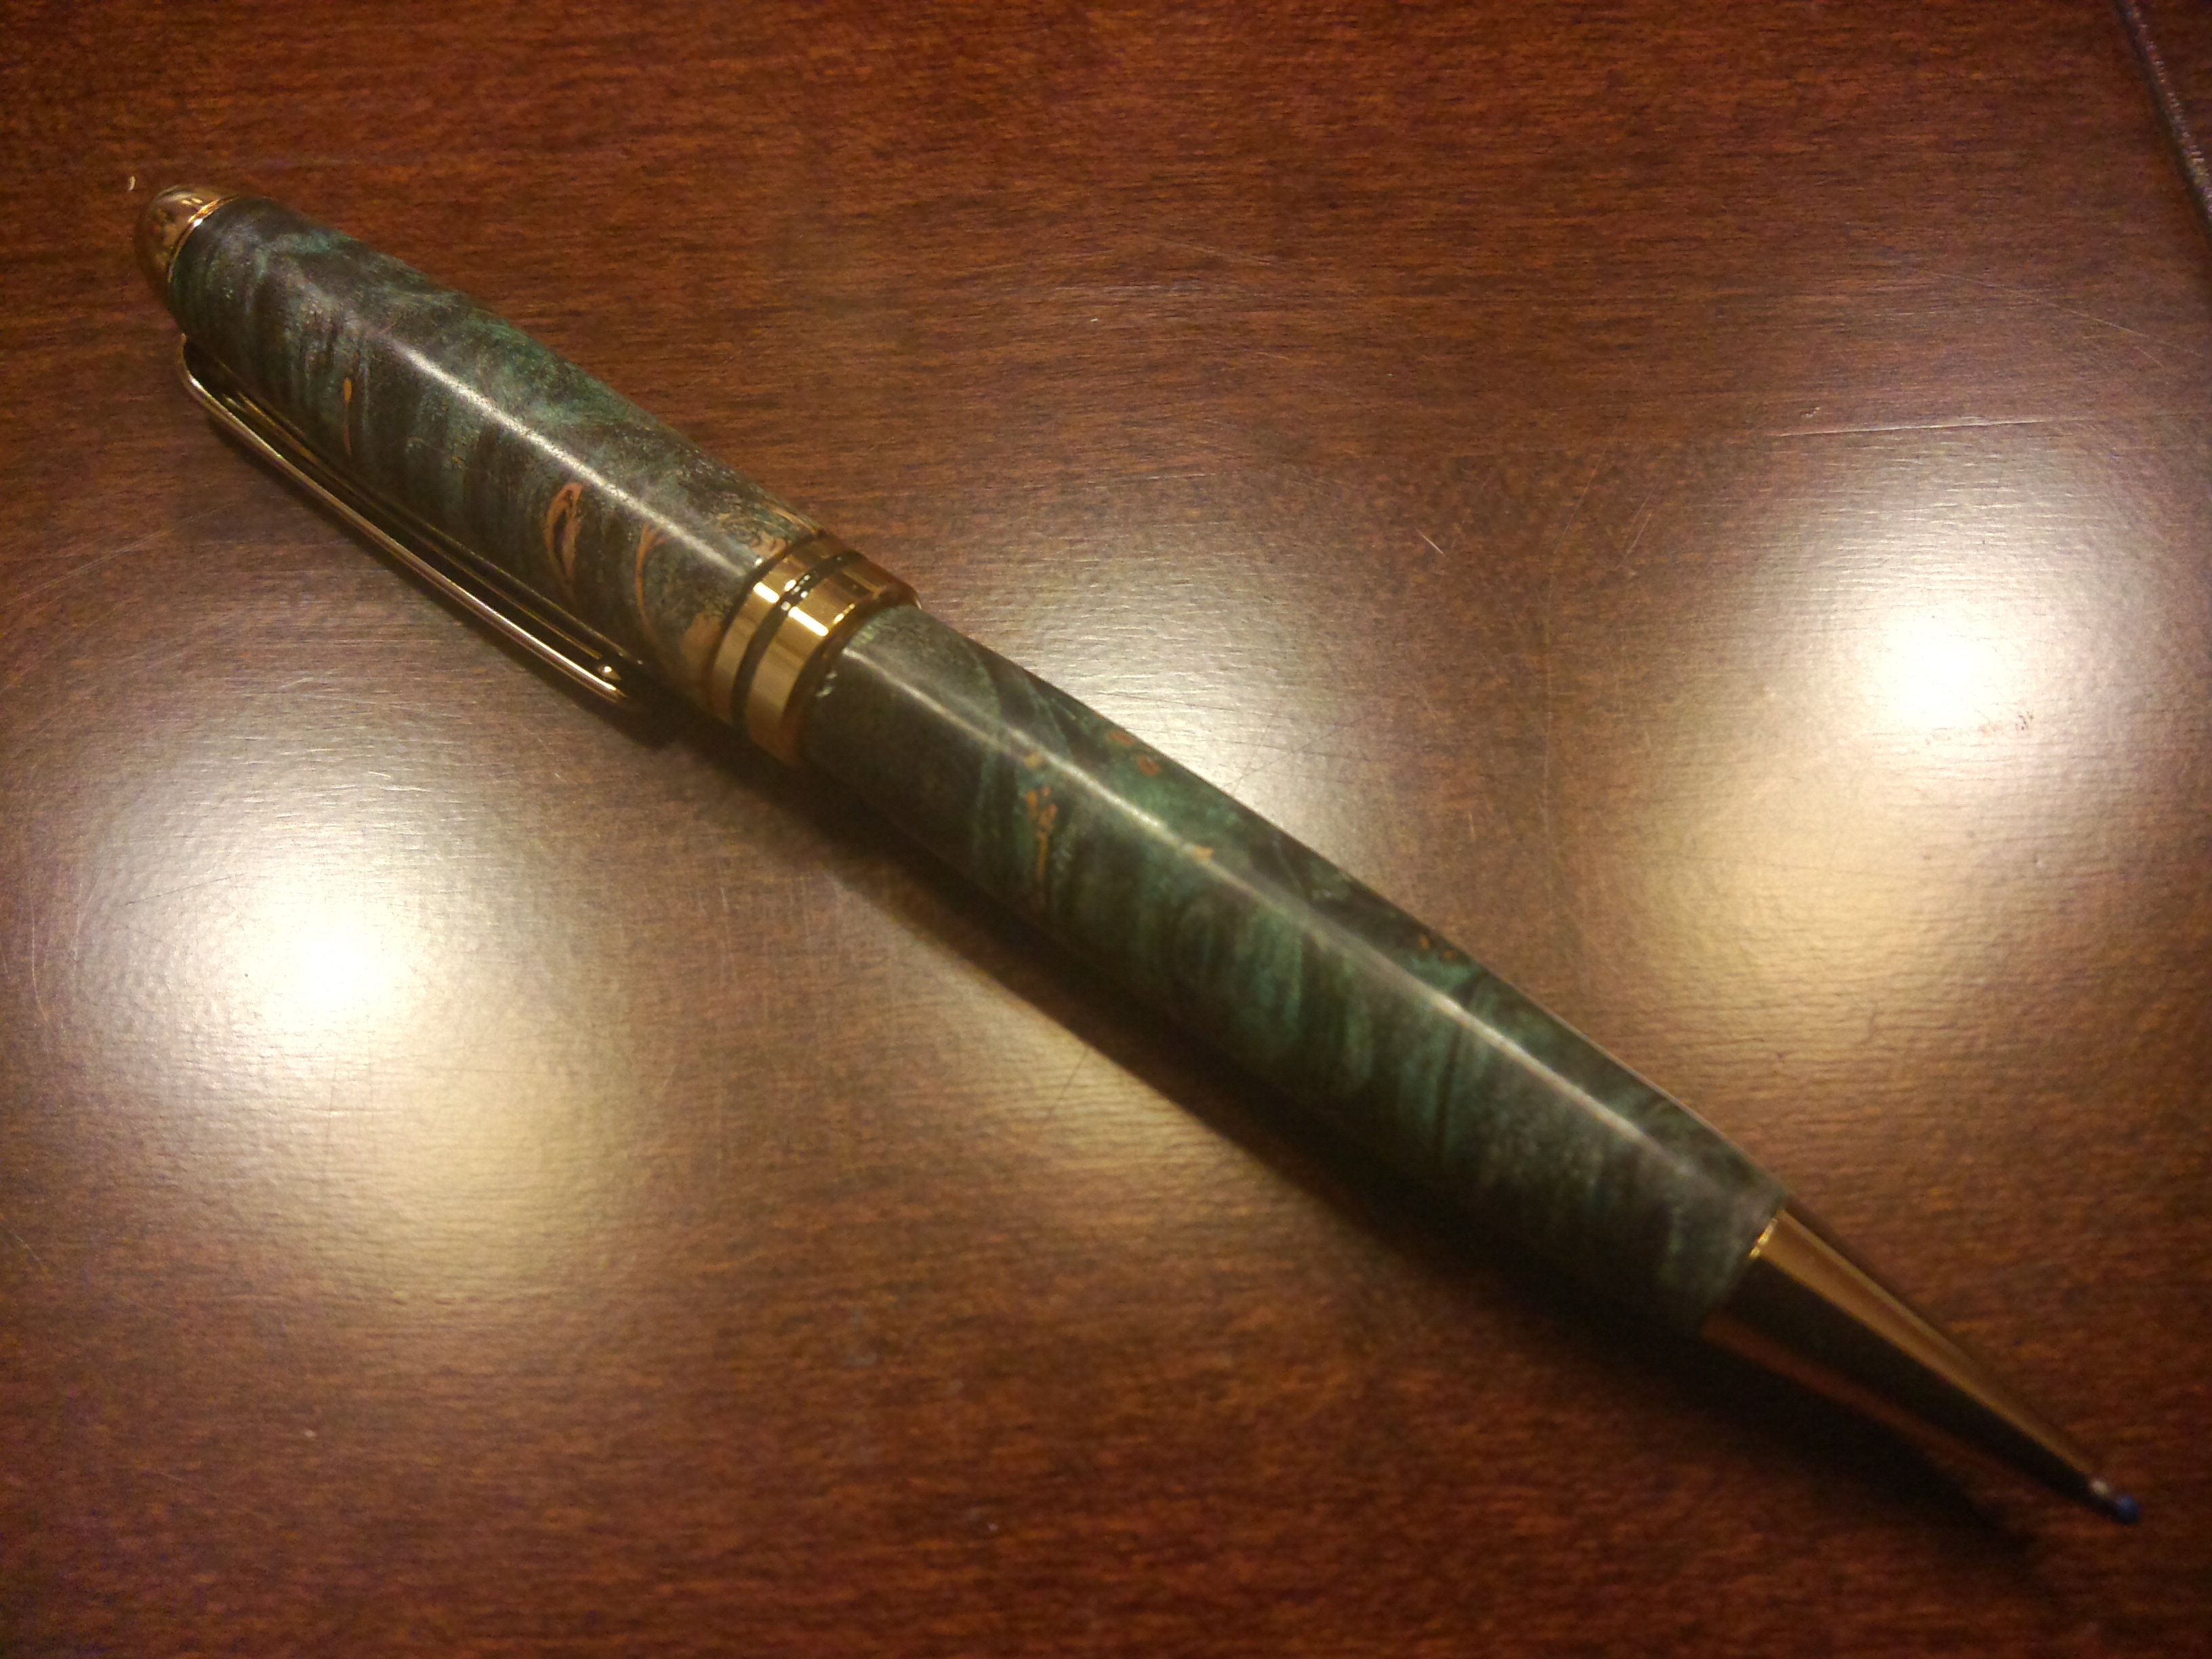
    I am very pleased with this pen and will have to make some more.


  • In one of my orders from William-Woodright, he sent me a free pen-blank that was a Spectraply called Fighting Irish.  When I turned the pencil I realized that they were the colours of the Air Cadet Gliders.  My source of off-cut wood is a professional wood-worker named Bonnie.  She is also the CO of the local Air Cadet Gliding Centre.  I think these pencils, with a 5.6mm lead are excellent shop pencils, so I think I will give this to her to thank her for supplying me with more wood than I could ever turn.


    Artist Sketch Pencil in Spectraply "Fighting Irish" from William-Woodright.
    Artist Sketch Pencil in Spectraply “Fighting Irish” from William-Woodright.
    Artist Sketch Pencil in Spectraply "Fighting Irish" from William-Woodright.
    Artist Sketch Pencil in Spectraply “Fighting Irish” from William-Woodright.


  • Another colleague is leaving the section this week and, as I am getting a reputation, I decided to make a pen for Meaghan.  Again, because she is Air Force, I made another Acrylic in Blue and Black.  The pen kit is a Deco Slimline.  After my most recent debacle on the acrylics (perhaps debacle is overstating it a bit) I decided to take my time with this one.  I started with a roughing gouge then moved on to a small bowl gouge and finished with a round end scraper.  This went much better than the previous ones, although I still need to taper the blanks towards the ring to make the transition a little smoother.  I finished the pen with wet micromesh pads… from 1500 grit to 12000 grit.  It leaves a beautiful glossy finish that is very satisfying to do.

    Black & Blue Acrylic in a Deco Slim-line pen kit
    Black & Blue Acrylic in a Deco Slim-line pen kit


  • This blank is a natural burl.  To finish it, I sanded: 120 – 240 – 600 and then ran through the micro-mesh pads.  Once glossy, I put three coats of Turner’s finish on the pen, and used the 12000 micro-mesh pad between coats.  Finally I applied a liberal coat of Conservator’s wax.  I am very pleased with how well it finished.  It is glossy but not quite as shiny as acrylic would be.  A very rich look.


    European round top pen.
    European round top pen.
  • I had 2 European pen kits waiting for some wood and I tried my hand at turning my first Burl woods.  The first project of the weekend was a blank called Teal Dyed Burl.  I’m not sure if this burl is stabilized with resin, but the dye was kind of messy.  I finished the pen with micro-mesh and it finished very well.  I didn’t put polyurethane or conservator’s wax on it and I hope that’s not a mistake.  I guess time will tell.

    IMG_20130518_212307

  • A couple of weeks ago, I received from William Wood-Wright (www.penblanks.ca) an order of Artist Sketch Pencil kits.  These are mechanical pencils that use a 5.6mm lead in a Collet type holder.  One of the steps in making pens is to trim the rough blank in order to square the blank to the tube.  You have to be careful that you don’t shorten the tube, because you run the risk of your kit not going together.  One tool to accomplish this is called a Pen Mill.  It has a pilot shaft that fits down the tube and there is a cutter head that cuts away excess wood and squares the tube to the blank. In order to maintain a “square” the pilot shaft has to fit the tube snugly.  I neglected to purchase the correct pilot shaft when I ordered and so I didn’t immediately try to make one of these pencils.  This week, I was thinking about it again and realized that I could likely use my belt sander to do this.

    This morning, I went down to the shop and tried.  Sure enough, my sander worked fine and I now have a sketch pencil.

    The first of many.  I beliee this is mahogany.

    The lead in this pencil is 5.6mm in diameter and i is held by a collet style holder.  There is a sharpener in the cap end. A very ingenious design, although it is a little on the fat side.  This will work well in my shop.

    I purchased a 15/32 nd drill bit to drill this hole in the blank and found that the tube was quite loose in the hole.  I let the CA glue set up for several minutes befor I squared the ends.  Not sure if it is just the mahogany that made the bit push out a bit or if it is the wrong size of bit.

  • Another colleague is leaving the section tomorrow and, like the pen I made for the chief, I thought that I would make  Pen and Pencil set.  Doug is an Air Force Warrant Officer and so I wanted a blue set.  Lee Valley had these Black and Blue Acrylic (Acetate) blanks.  I thought they were a little dark, but they were the only blue that they had and so I decided that they will do the trick.

    For anyone interested, the blanks are rectangular blocks of wood or acrylic (or both wood and acrylic), like this one.

    This is the blank I started with tonight.
    This is the blank I started with tonight.

    The first one I made was the Pen.  I wasn’t 100% happy with it.  My mandrel was wobbly and I couldn’t get the tool marks out.  I didn’t discover this until I was well into the finishing.  I could have gone back… should have gone back, but I will chalk this one up to an education.

    The Pen from the set.  The kit is a Slimline and it has a neat Art Deco band as the centre ring.
    The Pen from the set. The kit is a Slimline and it has a neat Art Deco band as the centre ring.

    Taking what I learned from the pen, I turned the pencil from the set.  While not perfect, the pencil turned out much better than the pen.  It is also interesting that there is far more blue in this one, considering it came from the same blank.  I guess it was where the blank got drilled, as each blank was fabricated from two different parts of the blank.


    This is the pencil from the set.  Much more blue in this part of the blank.
    This is the pencil from the set. Much more blue in this part of the blank.

    And here is the set together.

    Using different parts of the same blank.
    Using different parts of the same blank.

    I found a nice simulated leather presentation case at Lee Valley as well.

    An inexpensive case from Lee Valley.
    An inexpensive case from Lee Valley.

    I hope Doug will enjoy this set.


  • I watched a really neat video the other night with Barbara Dill demonstrating a multi axis turning.  It is an incredible look, if a little scary.  To do this you chuck up the piece so it is quite crooked and then shave some of the piece away, then you rotate the piece and do the same thing, etc.  What you get, in this case, is a strange rotated piece that is no longer round.  The first picture below is taken from one end.  I believe you can see where I placed the chuck on 4 different axis points.  In this case it is three sided because I selected points that were 120 degrees apart from each other.

    The end view of a multi-axis experiment.
    The end view of a multi-axis experiment.

    The second picture shows the side view of this interesting way of turning, where each “side” twists 120 degrees from one end of the spindle to the other.

    The side view of this Multi-Axis experiment.
    The side view of this Multi-Axis experiment.

    The video of Barbara Dill, is excellent and really neat to watch.  You will understand why I say it is a bit scary.  Notice when it is wobbling, that the cutter seems to be shaving air, because you really can’t see the piece.  Of course her goblet is great and turned out much better than my little experiment, but it was neat to try and I will definitely try this again.  Maybe when I get my scroll chuck.

  • I chucked up one of the Maple Offcuts from Lee Valley this morning.  Wasn’t sure what I was going to do when I started.  I was just winging it.  I really wanted to work with some of the other tools, to try and see how they cut, and what kind of technique to apply.

    I tried:

    Large roughing gouge

    Small roughing gouge

    Parting tool (for the rings)

    Fingernail gouge

    Scraper (round nose) and

    Skew (both large and small)

    For a first attempt at captive rings, I was quite pleased, especially because I don’t have a ring chisel.  The difficulty came when I started shaping the goblet.  I kept catching the tools.

    There are 2 very important concepts when approaching a piece of wood that is spinning toward you at a couple thousand rpms.  The first is to “Ride the bevel”  What this means is you don’t let the cutting edge of your gouge touch the wood first.  You place the gouge on the wood so that the bevel rides on the wood and then you slowly pull the angle back until the cutter starts cutting.  The 2nd concept is, “always cut downhill”.  What I believe this means is you move the gouge from the bigger part towards the smaller part.  In the case of the goblet, I move from the wider part of the glass down towards the stem.  The problem that I was having was that my tools kept catching at the transition points.  In one of these pictures you can clearly see a catch just to the left of the rings.  After several tools and multiple attempts to smooth this out, I finally had to step away from it and take a break.  Perhaps one of the forums that I am a member of can guide me in the right direction.

    I don’t have all of the required equipment to finish the goblet (i.e. I need a scroll chuck so that I can pull back the tailstock to hollow the bowl, but until I get the chuck, I won’t be able to finish a bowl of this type.

    1st attempt at making captive rings.
    1st attempt at making captive rings.

    Goblet with Captive Rings 2
    Goblet with Captive Rings 2
  • Last weekend, I grabbed a short piece of birch from our wood pile and threw it on the lathe.  I wanted to see how it turned when it was off-balance.  I didn’t try and find the centres, I just kind of eyeballed it.  Well, it turned down pretty well, but I had to take an awful lot off to get it round and straight.  It was very satisfying to get a bunch of linguine noodle shavings.  Not something that happens with dry and seasoned wood.  It was quite a surprise when I got it to the finished stick how much moisture was still in the piece.

    After I cleaned up the workshop I was sitting in the living room and I had what I would describe as a fire hangover.  Jenn loves to have fires in our backyard firepit.  We often burn birch.  Actually, we almost exclusively burn birch.  I love fires too, but it seems to take me three days to feel normal again.  What I have described as a wood fire hangover.  Well, after turning the piece of birch I felt the same way which leads me to guess that I am allergic to Birch.  Not exactly scientific, but certainly the connection can’t be ignored.

    Birch straight from the firewood pile.
    Birch straight from the firewood pile.


    Birch after turning.
    Birch after turning.